12 Flappy Bird
Today we will stat developing a Flappy Bird game. You control a bird that must fly through the openings in the obstacles but your only action is to “flap the wings” in order to counteract the effect of gravity. This is how the game will look like at the end.
12.1 Chapter concepts
- Object-oriented programming
- Computed properties of objects:
@property
We will use this game as an opportunity to learn more about object-oriented programming. You already know how to use classes, now you get to create them and see how it makes your life easier.
12.2 Object-oriented programming
The core idea is in the name: Instead of having variables/data and functions separately, you combine them in an object that has attributes/properties (its own variables) and methods (functions). This approach uses our natural tendency to perceive the world as a collection of interacting objects and has several advantages that I will discuss below.
12.2.1 Classes and objects (instances of classes)
Before we continue, I need to make an important distinction between classes and objects67. A class is a “blue print” that describes properties and behavior (methods) of objects of that class. This “blue print” is used to create an instance of that class, which is called an object. For example, Homo sapiens is a class that describes species that have certain properties, such as height, and can do certain things, such as running. However, Homo sapiens as a class only has a concept of height but no specific height itself. E.g., you cannot ask “What is height of Homo sapiens?” only what is an average (mean, median, etc.) height of individuals of that class. Similarly, you cannot say “Run, Homo sapiens! Run!” as abstract concepts have trouble with real actions like that. Instead, it is Alexander Pastukhov who is an instance of Homo sapiens class with a specific (average) height and a specific (below average) ability to run. Other instances of Homo sapiens (other people) will have different height and a different (typically better) ability to run. Thus, class describes what kind of properties and methods objects have. This means that whenever you meet a Homo sapien, you could be sure that they have height. However, individual objects have different values for various properties and so calling their methods (asking them to perform certain actions) may result in different outcomes.
Another, a more applied, example would be your use of ImageStim class to create multiple instances of front side of a card in Memory game. Again, the class defines properties (image, pos, size, etc.) and methods (e.g., method draw()) that individual objects will have. You created these objects to serve as front side of cards. You set different values for same properties (image, pos) and that ensured that when you call their method draw(), each card was drawn at its own location and with it own image.
12.2.2 Encapsulation
Putting all the data (properties) and behavior (methods) inside the class simplifies programming by ensuring that all relevant information can be found in its definition. Thus, you have a single place that should hold everything that defines object’s behavior. Contrast this with our approach in previous seminars where cards as dictionaries were separate from functions that created them. Today, you will see how encapsulating everything into classes turns this mess into a simpler and easier-to-understand code.
12.2.3 Inheritance / Generalization
In object-oriented programming, a class can be derived from some ancestor class and thus inherit its properties and methods. Moreover, several classes can be derived from a single ancestor producing a mix of unique and shared functionality. This means that instead of rewriting the same code for each class, you can define a common code in an ancestor class and focus on differences or additional methods and properties in descendants.
Using the Homo sapiens example from above. Humans, chimpanzees and gorillas are all different species but we share a common ancestor. Hence, we are different in many respect, yet, you could think about all of us as “apes” that have common properties such as binocular trichromatic vision. In other words, if you are interested in color vision, you do not care what specific species you are looking it, as all apes are (roughly) the same in that respect. Or, you can move further down the evolution tree and think about us as “mammals” that, again, have common properties and behavior, such as thermoregulation and lactation. Again, if you are interested only in whether an animal has thermoregulation, knowing that it is a mammal is enough.
Similarly, in PsychoPy various visual stimuli that we used (ImageStim, TextStim, Rect) have same properties (e.g., pos, size, etc.) and methods (most notably, draw()). This is because they are all descendants from a common ancestor BaseVisualStim that defines their common properties and methods68. This means that you can assume that any visual stimulus (as long as it descends from BaseVisualStim) will have size, pos, ori and can be drawn. This, in turn, means that you can have a list of various PsychoPy visual stimuli and move or draw all of them in a single loop without thinking which specific visual stimulus you are moving or drawing. Also note that you cannot assume these same properties for sound stimuli because they are not descendants of BaseVisualStim but of _SoundBase class.
There are other ways of achieving common behavior (generalization) in Python without orderly inheritance, such as “duck typing”69 or mixins but this will be a topic of another chapter.
12.2.4 Polymorphism
As you’ve learned in the previous section, inheritance allows different descendants to share common properties and behavior, so that in certain cases you can view them as being equivalent to an ancestor. E.g., any visual stimulus (a descendant of BaseVisualStim class) can be drawn, so you just call its draw() method. However, it is clear that these different stimuli implement drawing differently, as the Rect stimulus looks different from the ImageStim or TextStim. This is called “polymorphism” and the idea is to keep the common interface (same draw() call) while abstracting away the actual implementation. This allows you to think about what you want an object to do (or what to do with an object), instead of thinking how exactly it is implemented.
12.2.5 A minimal class example
Enough of the theory, let us see how classes are implemented in Python. Here is a very simple class that has nothing but the constructor __init__() method, which is called whenever a new object (class instance) is created, and a single attribute / property total.
class Accumulator:
    """
    Simple class that accumulates (sums up) values.

    Properties
    ----------
    total : float
        Total accumulated value
    """

    def __init__(self):
        """
        Constructor, initializes the total value to zero.
        """
        self.total = 0

# here we create an object number_sum, which is an instance of class Accumulator.
number_sum = Accumulator()
print(number_sum.total)
Let’s go through it line by line. First line class Accumulator: shows that this is a declaration of a class whose name is Accumulator. Note that the first letter is capitalized. This is not required per se, so Python police won’t be knocking on your door if you write it all in lower or upper case. However, the general recommendation is that class names are written using UpperCaseCamelCase whereas object (instances of the class) names are written using lower_case_snake_case. This makes distinguishing between classes and objects (instances of classes) easier, so you should follow this convention.
The definition of the class are the remaining indented lines. As with functions or loops, it is the indentation that defines what is inside and what is outside of the class. The only method we defined is def __init__(self):. This is a special method70 that is called when an object (instance of the class) is created. This allows you to initialize the object based on parameters that were passed to this function (if any). You do not call this function directly, rather it is called whenever an object is created, e.g., number_sum = Accumulator() (last line). Also, it does not return any value explicitly via return. Instead, self (the very first parameter, more on it below) is returned automatically.
All class methods (apart from special cases we currently do not concern ourselves with) must have one special first parameter that is the object itself. By convention it is called self71. It is passed to the method automatically, so whenever you write square.draw() (no explicit parameters written in the function call), the actual method still receives one parameter that is the reference to the square variable whose method you called. Inside a method, you use this variable to refer to the object itself.
Let us go back to the constructor __init()__ to see how you can use self. Here, we add a new persistent attribute/property to the object and assign a value to it: self.total = 0. It is persistent, because even though we created it inside the method, the mutable object is passed by reference and, therefore, we assigned it to the object itself. Now you can use this property either from inside self.total or from outside number_sum.total. You can think of properties as being similar to field/value pairs in the dictionary we used in Memory game but for syntax: object.property versus dictonary["field"]72. Technically, you can create new properties in any method or even from outside (e.g., nothing prevents you from writing number_sum.color = "red"). However, this makes understanding the code much harder, so the general recommendation is to create all properties inside the constructor __init__() method, even if this means assigning None to them73.
12.2.6 add method
Let us add a method that adds 1 to the total property.
class Accumulator:
    ... # I am skipping all previous code here

    def add(self):
        """
        Add 1 to total
        """
        self.total += 1
It has first special argument self that is the object itself and we simply add 1 to its total property. Again, remember that self is passed automatically whenever you call the method, meaning that an actual call looks like number_sum.add().
Create a Jupyter notebook (you will need to submit it as part of the assignment) and copy-paste the code for Accumulator class, including the .add() method. Create two objects, call them counter1 and counter2. Call .add() method twice for counter2 and thrice for counter1 (bonus: do it using for loop). What is the value of the .total property of each object? Check it by printing it out.
Copy-paste and test Accumulator class code in a Jupiter notebook.
12.2.7 Flexible accumulator with a subtract method
Now lets us create a new class that is a descendant of the Accumulator. We will call it FlexibleAccumulator as it will allow you to also subtract from the total count. You specify ancestors (could be more than one!) in round brackets after the class name
class FlexibleAccumulator(Accumulator):
    pass # You must have at least one non-empty line, and pass means "do nothing"
Now you have a new class that is a descendant of Accumulator but, so far, is a perfect copy of it. Add subtract method to the class. It should subtract 1 from the .total property (don’t forget to document it!). Check that it works. Create one instance of Accumulator and another one of FlexibleAccumulator class and check that you can call add() on both of them but subtract() only for the latter.
Add subtract method to the FlexibleAccumulator
class in a Jupiter notebook. Add testing.
12.3 Method arguments
Now, create a new class SuperFlexibleAccumulator that will be able to both add() and subtract() an arbitrary value. Think about which class it should inherit from. Redefine both .add() and .subtract() method in that new class by adding value argument to both method and add/subtract this value rather than 1. Note that now you have two arguments in each method (self, value) but when you call you only need to pass the latter (again, self is passed automatically). Don’t forget to document value argument (but you do not need to document self as its meaning is fixed).
Create SuperFlexibleAccumulator class and define
super flexible add and subtract methods
that have value parameter ( in a Jupiter notebook).
Test them!
12.3.1 Constructor arguments
Although constructor __init(...)__ is special, it is still a method. Thus, you can pass arguments to it just like you did it for other methods. You pass these arguments when you create an object, so in our case, you put it inside the bracket for counter = SuperFlexibleAccumulator(...).
Modify the code so that you pass the initial value that total is set to, instead of zero.
Add initial_value parameter to the constructor of the SuperFlexibleAccumulator class in a Jupiter notebook. Test it!
12.3.2 Calling methods from other methods
You can call a function or object’s method at any point of time, so, logically, you can use methods inside methods. Let’s modify our code, realizing that subtracting a value is like adding a negative value. Modify your code, so that .subtract() only negates the value before passing it to .add() for actual processing. Thus, total is modified only inside the add() method.
Modify subtract() method of SuperFlexibleAccumulator
to utilize add() in a Jupiter notebook.
Test it!
12.3.3 Local variables
Just like normal functions, you methods can have local variables. They are local (visible and accessible only from within the method) and are not persistent (their values do not survive between the calls). Conceptually, you separate variables that need to be persistent (retain their value the whole time object exists) as attributes/properties and temporary variables that are need only for the computation itself as local method variables. What would be value of property .total in this example:
class Accumulator:
    def __init__(self, initial):
        temp = initial * 2
        self.total = initial

counter = Accumulator(1)
What about in this case?
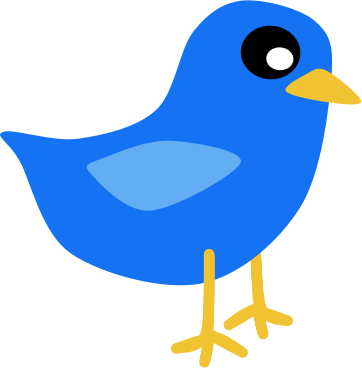
12.4 Flappy Bird: the humble beginnings
We will start with a basic scaffolding for our program. Download the bird image74 and put it into a folder where you will store the code. Create a basic code that uses settings file that defines minimal setting for a window (size) and a bird (image file). Organize it hierarchically, as follows, as this will help us keep settings for different classes organized.
Create a window using this specified size and an ImageStim using the filename from the settings file. Add a basic game loop in which you repeatedly draw the bird (should appear right at the center of the screen) and check for a key press (escape should exit the game).
Put your code into code01.py.
12.5 Flappy Bird class
Our flappy bird is, effectively, an image but we would like it to have additional behaviors, like, automatically falling down due to gravity, flying up due to flapping its wings, etc. There are several way we can do this. We can keep the image in ImageStim and write additional functions to handle it (the way we did previously). We could create an new class FlappyBird that will have the ImageStim as its attribute. Or, we could utilize the power of inheritance and build FlappyBird class on top of the ImageStim. This means less work for us, so that is the path we will follow.
Create a new file that will contain your FlappyBird class. Here is how it should look like:
"""Your comment on what this file contains.
"""
# import libraries, which ones do you need?

class FlappyBird(visual.image.ImageStim):
  """
  FlappyBird class based on ImageStim
  """
  def __init__(self, win, settings):
    """
    Constructor.
    """
    super().__init__(win, image=settings["Image"])
In the code above, I defined FlappyBird as a descendant of the ImageStim75. To make the latter work, we need to initialize it properly by calling it constructor. This is what super().__init__(...) call does: Calls constructor of the ancestor class (super() refers to the immediate ancestor) to enable all the magic that we want to reuse. Recall that ImageStim needs at least two parameters: a PsychoPy window that the stimulus will belong to and an image (a filename in this case). Here, I assume that when I create a bird object (call the constructor), I pass two parameters (again, self comes “for free”, so you do not pass it explicitly but assume that it is the first argument that you get): the [window]((https://psychopy.org/api/visual/window.html#psychopy.visual.Window) that we created plus a dictionary with settings for the bird (there will be more settings, so it would be practical to pass the whole dictionary instead of passing one parameter at a time).
Copy paste that code (plus add appropriate imports and comments) and use FlappyBird class instead of ImageStim. Note that FlappyBird inherits all its functionality from ImageStim, so, apart from how you create it, you can use it in exactly the same way. Meaning, you do not need to modify anything else in your code (told you, it would save us time and effort!).
Put FlappyBird class code into a separate file.
Use it instead of ImageStim in code02.py.
12.6 A properly-sized bird
Our bird is very cute but is way too large. Add a new setting for it (I suggest calling is Size and setting it to 0.1) and then use it inside the constructor adding size=... to super().__init__ call. Do you need to change anything in the main code?
Add bird size setting.
Use it in FlappyBird class constructor.
12.7 Flappy Bird is falling down (my dear lady)
Before our bird flies, it needs to learn how to fall down. Falling down is just a change of bird’s vertical position based on bird’s vertical speed. We already have a property for the (horizontal and) vertical position: self.pos, a tuple with (x, y) position of the center of the image. But we do need an additional new attribute that would encode bird’s vertical speed. Create it in the constructor (if you forgot how to do it, take a look above on how we create the total attribute for Accumulator class) and call it vspeed. Also, create a new setting (I would call it "Initial vertical speed") and set it to -0.01, use this setting in the constructor to initialize vspeed.
Now we also need a method that would update bird’s position based on its (current) speed. Create this method below the constructor (does it need any parameters beyond compulsory self?). It should simply compute \(y_{new} = y + vspeed\) and assign \(y_{new}\) back to pos attribute (note that you cannot assign only y coordinate, you have to pass the tuple (x, y) reusing original x value from pos). Do not forget to document the new method!
Now you need to call the update() on each frame before drawing the bird. This should make your bird fall of the screen! (Experiment with "Initial vertical speed" setting to make it fall faster or slower or even upwards!)
Update FlappyBird class.
Use update method in code03.py.
12.8 Timing the fall
Currently, the speed of our bird’s fall is measured in norm units per frame. This works but these are not the most convenient units to think in. Plus, it relies on PsychoPy (and the rest of our code) to ensure that time between individual frames is exactly the same. This is mostly the case and an occasionally slow bird is not a big problem for a game. However, that might be a problem for an actual experiment that requires precise timing of movement. Thus, we need to think about vertical speed in units of norm units per second and measure time between calls of update() method ourselves.
Create a new Clock attribute that will count the time elapsed since it last reset (I would call it frame_timer). Modify the update() method to compute \(y_{new} = y + vspeed * T_{elapsed}\), where \(T_{elapsed}\) is the time elapsed between frames. Do not forget to reset the timer! (What will happen if you do forget?)
Now set your "Initial vertical speed" to some reasonable value (e.g., 0.5) and check that the time it takes for the bird to fall of the screen looks reasonable (for 0.5 norm units / second it should be off the screen in two seconds).
Update FlappyBird class with a timer.
12.9 It is all Newton’s fault
Now let us add gravity, so that the speed of falling would be constantly changing. Create a new setting and call it "Gravity". Set it to -0.5 (units are norm units per second squared) but experiment with different values later on. Acceleration due to gravity changes vertical speed just like speed itself changes the vertical position76. Update your update method to change the speed based on acceleration given the elapsed time. What do you need to update first, the speed or the location? Also, think about how you will store the acceleration: It is in settings parameter that exists only in the constructor. You can either store it in a new attribute or store all settings in an attribute for later use.
Update FlappyBird class with acceleration due to gravity.
12.10 Flap bird, flap!
Let us add ability of the bird to “flap” in order to stay in the air. First, create a new setting Flap speed and set it to 0.4 (as usual, feel free to experiment!). Add a new method .flap(self) and inside simply set vspeed to Flap speed. Thus, a single flap sets the bird flying up with Flap speed speed which, however, will be constantly reduced by the acceleration due to Gravity so the bird will eventually start falling down again.
In the main code, check for "escape" and "space" keys. If the latter is pressed, call .flap() method of the bird. Check that you can keep the on the screen by timing the space button presses or can make it fly upwards off the screen.
Add flap method to FlappyBird class.
Use it in code04.py whenever player presses space.
12.11 Stay off the ground
In our game, the player can lose either if they hit an obstacle (we do not have any yet) or if the bird drops below the ground level, i.e., the bottom edge of the window. Create a new method is_airborne() that will return True if y position of the bird is above -1 (note, you do not need an explicit if for this, nor do you need to write True or False anywhere, think how this can be done without these).
In the main loop add the check for bird.is_airborne() condition so that it continues until player presses "escape" or the bird hits the ground.
Add is_airborne method to FlappyBird class.
Use it in code05.py as an additional condition
for the game loop.
12.12 Computed attribute @property
As was explained the in “Object-oriented programming” section above, properties describe state of an object, whereas methods describe what an object can do or what you do to an object. Our is_airborne() method breaks this logic: It describes the state of the bird but we call it (use it) as a method. What we have here is a computed property that is inferred from other properties of an object. In our case, we infer property is_airborne from y. We could, of course, make is_airborne into a real property by defining it in the constructor and then updating it inside update() method. However, we will instead use a cool feature called decorators to turn a method into a read-only property. The only thing you need to do is to add @property decorator right above the def is_airborne(self): line and drop brackets when using it in the main loop (so just bird.is_airborne instead of bird.is_airborne()).
@property tells Python that the method right below will (must!) return a value and that outside world should see it not as a method but as a property. You can use it to make properties read-only, so that they could not be (easily) changed from outside or to create properties that are computed on-the-fly as in our example.
Note that difference is not so much of practical implementation (changes we made to the code were minimal) but of a conceptual nature: Object’s states should be properties not methods. In our small example this may look like an overkill but in a moderately complex project even small conceptual blurring of lines could make it harder to understand the code.
Turn is_airborne into a property.
Use it as property in code06.py.
12.13 An opening in an obstacle
We aim of the game is for the bird to fly avoiding obstacles. An obstacle consist of two rectangle, one that protrudes from above and another one from below. The opening between them gives the bird an opportunity to fly through. So let us begin by writing a code (in the Jupyter notebook) that would generate a random opening, characterized by y_bottom and y_top based on four parameters:
-
lower_margin: lowest possible position of the bottom of the opening relative to the bottom of the screen, i.e., they_bottomcannot be closer to -1 than that. -
upper_margin: higher possible position of the top of the opening relative to the top of the screen, i.e., they_topcannot be closer to 1 than that. -
min_size: the minimal size of the opening, i.e., minimal distance betweeny_topandy_bottom. -
max_size: the maximal size of the opening, i.e., maximal distance betweeny_topandy_bottom.
Write a code that assume certain values for each parameter (e.g., lower_margin = 0.2, upper_margin = 0.2, min_size = 0.2, max_size = 0.4) and generates a random pair (y_bottom, y_top) that satisfies the conditions.
Write a random opening code in a Jupiter notebook.
12.14 An obstacle
Now let us create an Obstacle class (put it into a separate file). It will consist of two rectangles, one protruding from the top and the other one from the bottom, with a random opening in between. At the moment you need six settings to describe an Obstacle: The four parameters that define a random opening plus a width of rectangles and their color. Describe them as a separate group in the settings files (probably under "Obstacles") and pass them to the constructor of the Obstacle class.
In the constructor, generate a random opening (you have the code for this already) and create the two rectangles both width wide, one going from the top till y_top, another one from the bottom till y_bottom. Place both horizontally at the right edge of the window but so you could see them. Decide on how you will store the two rectangles, you can put them into two different attributes (e.g., upper_rect and lower_rect) or have them in a list. I would suggest the latter approach, as it will simplify your future code. Think about which parameters you need for the __init__() constructor function.
You also will need a draw() method that simply draws both rectangles. Implement the class in a separate file, then create and draw a single obstacle in the main code to check that it looks right.
Create Obstacle class in a separate file.
Use it in code07.py.
12.15 A moving obstacle
Conceptually, our bird fly towards an obstacle but instead we will induce perception of its motion by moving obstacles from right to left. Define a new speed setting for an Obstacle class, it should be in norm units per second and create an update method that would change horizontal position of both rectangles based on the amount of time that passed between the calls. This is similar to how we updated bird’s position based on its speed, so follow the same logic and think about which additional attributes you require and how you store and use any relevant information.
Call update() at the same place that you update bird’s location in the main loop and check that the obstacle is moving from right to left.
Add update method to Obstacle class.
Use it in code08.py.
12.16 Hitting the wall
At the moment, our bird is flying through the obstacle like it is not there. But it is! Luckily for us, PsychoPy makes implementing this very easy, as it can check whether two stimuli overlap using overlaps() method of one of them (and the second stimulus is passed as an argument).
Thus, to check whether the bird hit the wall, we just need to create a method (let us call it check_if_hit) in an Obstacle class that will take a bird object and check whether it overlaps() with one of the rectangles. Remember, our FlappyBird is a descendant of the ImageStim, so we can pass it to the overlaps() method directly (advantage of using the inheritance!)
In the main game loop, add the check for the bird not hitting the obstacle to the main condition (so now you should have three things to check for). Test your code by flying the bird into the wall. Also, by flying your bird through the opening. Note that if our settings make it too tricky, modify them to make the opening larger.
Add check_if_hit method to Obstacle class.
Use it in code09.py.
12.17 An obstacle manager
A game with a single obstacle is no fun but before we add more, we need a class that will manage them for us. Let us call it ObstaclesManager. For the moment, it will simply wrap up all functionality that we implemented in the main script. In the constructor, it should create a list attribute for obstacle objects and add a first one, it should also implement methods draw(), update(), and check_if_hit() that draws, updates, and checks for an overlap with a bird for all obstacles on the list. For the moment we will still have just one of them in the list but implementing things in the loop means it will be easier to add more. Create the class and then use it in the main script.
There should be no actual changes of how the game plays, just the code refactoring. However, it helps us to hide the management part from the main script (making it easier to understand) and, if you did everything correctly, the code should “just work” once you replace Obstacle with ObstaclesManager object.
Create ObstaclesManager class.
Use it in code10.py.
12.18 Loads of obstacles
Now we are ready to add more obstacles. You need to update the update method of the ObstaclesManager so that it adds a new obstacle to the list after a random time interval. Define a new setting Spawn time, a list of two values that define a minimal and maximal time between spawns, and create a CountdownTimer (or a Clock, remember they differ only in whether time is subtracted or added) attributed. Whenever the timer is up, add a new obstacle to the list, generate a new delay, and set the timer again. Note that now you need settings and a Window in the update because they are required for creating a new obstacle. Think how you can store them for later use in the constructor.
Do you need to change anything in the main script? Check that more obstacles appear over time!
Update update of the ObstaclesManager class.
12.19 Removing redundant obstacles
Once the obstacle is past the left edge of the screen (its x-axis position is less than -1) we need to remove it from the list. Otherwise, we will waste a lot of time and memory keeping track and drawing obstacles that are neither relevant, nor visible. Think about how you would implement this before reading further.
First, we need to compute the horizontal position of an obstacle. You can deduce it from pos attribute of one of the rectangles and implement this use of attribute (pos of Obstacle) of an attribute (obstacles of ObstaclesManager) directly. However, working with attributes of attributes makes code harder to read and to maintain. Instead, add a new computed property x to Obstacle class that would return a single number (horizontal position) using @property decorator we used for the bird’s is_airborne dynamic attribute.
Update the update method of the ObstaclesManager to check the position the first obstacle in the list. If it less than -1, simply pop it from the list. Why the first one? Because any other obstacle in the list was added later and, therefore, must be further to the right. Why only the first one? If we assume both a reasonable motion speed and a reasonable spawn delay, it is very unlikely that more than one obstacles reaches the left edge at the same time.
Note that for safety reasons, you must first check that the obstacles attribute is not empty! Hint, when used in a conditional statement directly, empty list evaluates to False. Debug the code to make sure that obstacles are indeed removed. You can either use a different cut-off point (e.g., -0.25) to see that easier or put a break point at the line that pops the redundant obstacle (better still, do both!)
Update update of the ObstaclesManager class.
12.20 Keeping the score
It is hard to brag about your bird-flying skills, if you do not how many obstacles did you fly through. Let us add the score! First, create a TextStim (call it score_text) and put it somewhere one the screen, e.g., a top-left or top-right corner. Initialize its text to "0". Draw it in the main loop. Make sure it works before you continue.
To keep the score, we need to count the number of obstacles that the bird clears on every frame and add it to the total score. As with the removal of redundant obstacles, it will be either zero or one obstacle that crossed the middle of the screen. But in this case, it is not the leftmost that we have to check but the leftmost among those that did not yet cross the mid-line. There are different way you can approach this, so think how you would approach this before reading on. And if you came up with a different plan, by all means – implement it!
My way of doing this is to introduce a new attribute scored = False and a method score() to the Obstacle class. In the score() method, if the object crossed the 0 line and has not been scored, it marked as scored and the method returns 1. Otherwise, the object was either already scored or did not cross the mid-line yet, so it returns 0. Next, I added a score() method to the ObstaclesManager that simply computes the total score (sum of) scores of all obstacles in the list. In the main script this score is added to a score variable that, in turn, is used to update score_text.
Update your code and
use it in code11.py.